The account is the only user credential to enter DbFace system. The DbFace account is comprised of username, password and e-mail address. You can sign in DbFace through username or e-mail address.
Sign Up
Use the browser to open DbFace website, Tap “Sign Up” link to enter the account registration page.
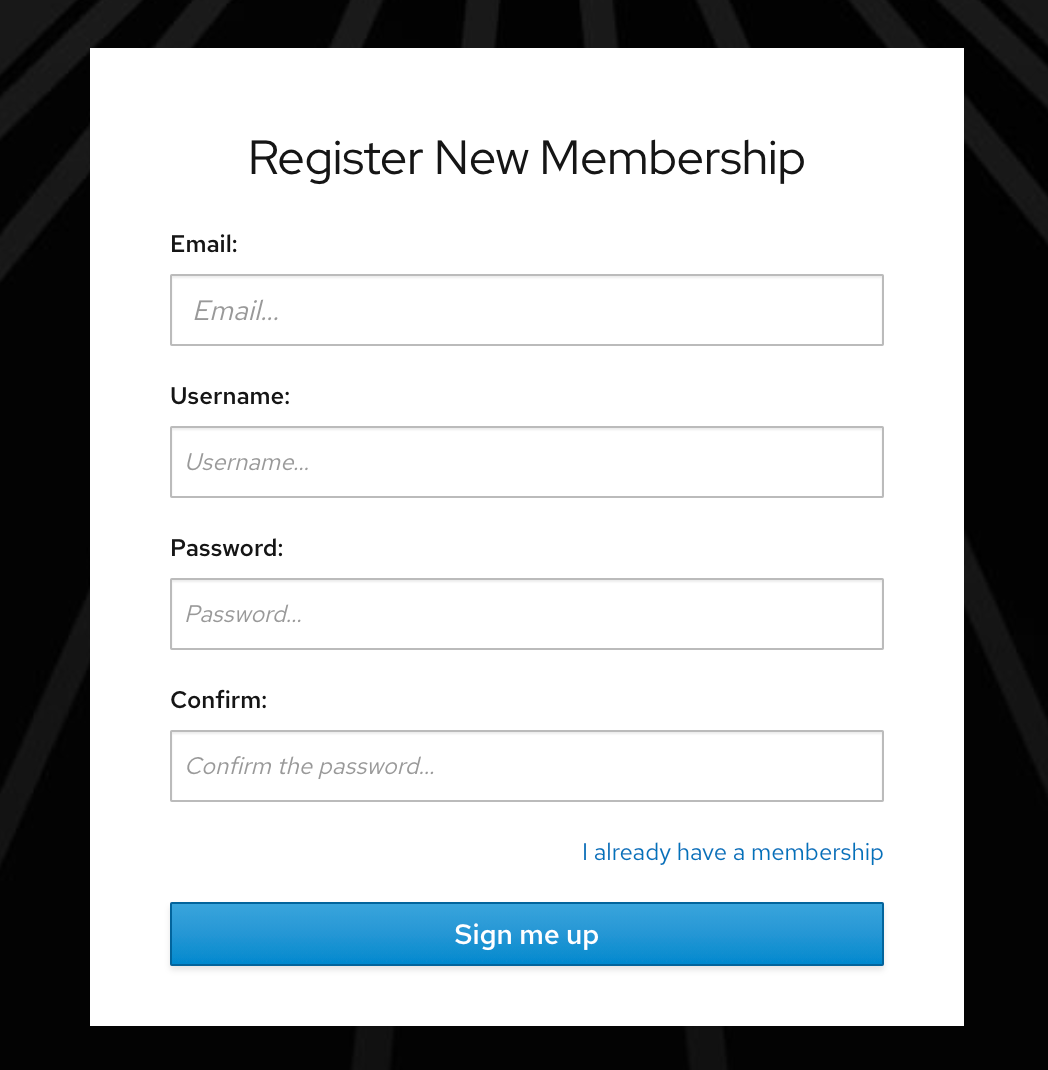
In this page enter your email address , username, password and click on the “Sign me up” button to create your DbFace account. Please make sure your email address is correct.
After the account created, DbFace will send you a welcome email, click the link in that email to activate your DbFace account.
You can also use Google or Facebook account to login directly (no need to register and activate).
Accessing DbFace
After the account was created, you can login DbFace system using your account. On DbFace website click on the “login” link to enter the login page. (If you choose the “Remember Password” button, the system will record the encrypted account information in your current machine Cookie, in the next 30 days, opening the landing page will automatically enter the system).

If you want to use Google or Facebook account to log in, tap the corresponding social login button without entering account information.
Subscription Plans
DbFace provides 4 types of subscriptions and up to 14-days trial period. You can upgrade or downgrade your account at anytime.
-
Basic
Basic package includes 5 sub-account, create up to 2 database connections, and up to 100 applications. -
Premium
Premium version does not apply the limitation to the number of sub-accounts, database connections and applications. -
Enterprise
Enterprise version allows you run updated DbFace on a managed VPS host, we will keep your DbFace always updated. Cloud code, PHP reports and other advanced features are only available on Enterprise plan. -
On-Premise
You can also host DbFace in your own environment with On-premise plan. On-premise license is lifetime, it means DbFace will never expired in your environment, but you still need to pay the upgrade fee (the license fee) to get the update after 1 year.
Click here to get information about Which plan should I use?
Click on “Settings” button in the current window, select the “subscription” tab to enter the subscription page. On this page, you can view your current subscription/trial status and expiration date, you can also renew or modify your subscription.

Note: This page might be different depending on your region.
Edit Profile
Click on “Settings” and select “User Profile” to edit your user profile. You can change your password, your profile avatar, email, username on this page.

Cancel Account
If you do not want to use DbFace service anymore, you can cancel your account at anytime. The account information stored in DbFace server will be fully deleted and unrecoverable, Please use caution.
When you cancel your account, we invite you to give us feedback so that we can improve our products. Your feedback will really help us make a better product for you and others like you.
On-Premises
You can also host DbFace on your own web server with On-Premises version. Please refer this page to get how to install DbFace in Docker environment.
Here is a video show you how to install DbFace On-premise on Docker:
If you already have prepared PHP5.3+(PHP5.3, PHP5.4, PHP5.5, PHP5.6, PHP7) webserver, you can also download DbFace zip file from the following URL, and install manually.
https://www.dbface.com/download-dbface
Unzip the file into your web server directory, use the browser to navigate to the URL, that will guide you how to install DbFace.
Click here to learn more information about manual installation.
Backup an On-Premises Installation
All DbFace applications data(sub-accounts, applications, settings, etc.) are stored in the user/ directory. You can backup the full user directory.
If you want to update to the latest version, you can copy the backup user directory to the new installation, all your DbFace data will be recovered safely.